|
How to Tie a Tie
Hello, Dear Friend,
My name is Aminul and I would like to
welcome you to my webpage on how to tie a tie!
I created this site for people just
like you:
- the working professional who
switched jobs recently and needs to wear a tie now but doesn't know
how to tie it,
- the college graduate figuring how to
tie a tie before that first job interview,
- the high school senior needing
immediate advice on tying ties before leaving for the prom,
- and, basically, anyone else who's
interested in learning how to tie a tie simply for the fun of it.
Yes, for the fun of it!
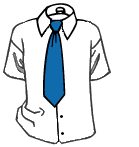
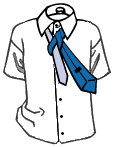
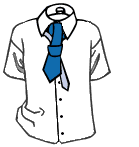
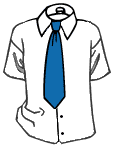
Windsor Knot
The Windsor Knot is a thick, wide and
triangular tie knot that projects confidence. It would therefore be your
knot of choice for presentations, job interviews, courtroom appearances
etc. It is best suited for spread collar shirts and it's actually quite
easy to do.
While just about everyone can use this
tie knot to tie his tie, it looks especially well on men with longer
necks as its wide form shortens the perceived height of the neck a
little bit.
To tie the Windsor Knot, select a tie
of your choice and stand in front of a mirror. Then simply follow the
steps below:
|
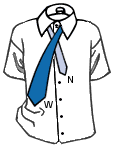
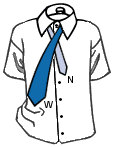
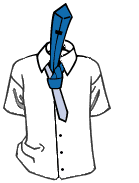
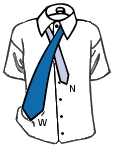
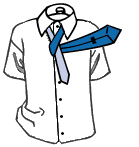
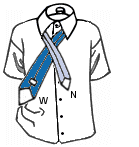
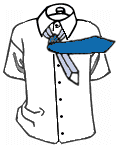
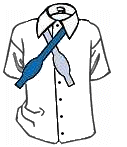
1) The wide
end "W" should extend about 12 inches below narrow end
"N". Cross wide end "W" over narrow end
"N".
|
|
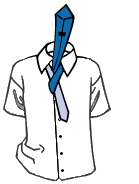
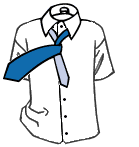
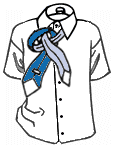
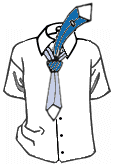
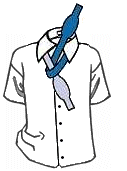
2) Bring wide
end "W" up through loop between collar and tie; then
back down.
|
|
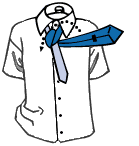
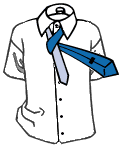
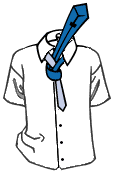
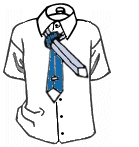
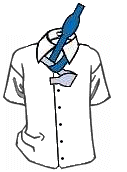
3) Pull wide
end "W" underneath narrow end "N" and to the
left, back through the loop and to the left again so that the
wide end "A" is inside out.
|

|
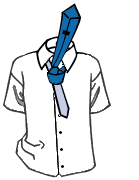
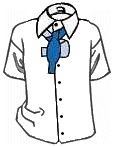
4) Bring wide
end "W" across the front from left to right.
|
|
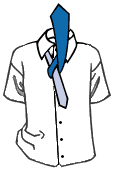
5) Pull wide
end "W" up through the loop again.
|

|
6) Bring wide
end "W" down through the knot in front.
|
 |
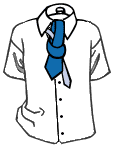
7) Using both
hands, tighten the knot carefully and draw up to collar.
|
The Half Windsor Knot, a modest version
of the Windsor Knot, is a symmetrical and triangular tie knot that you
can use with any dress shirt. It works best with somewhat wider ties
made from light to medium fabrics.
To tie the Half Windsor Knot, select a
tie of your choice and stand in front of a mirror. Then simply follow
the steps below:
|
1) The wide
end "W" should extend about 12 inches below narrow end
"N". Cross wide end "W" over narrow end
"N".
|
|
2) Bring wide
end "W" up around and behind narrow end "N".
|
|
3) Bring wide
end "W" up.
|
|
4) Pull wide
end "W" up and through the loop.
|

|
5) Bring wide
end "W" around front, over narrow end "N"
from left to right.
|
|
6) Again,
bring wide end "W" up and through the loop.
|
|
7) Bring wide
end "W" down through the knot in front.
|
 |
8) Using both
hands, tighten the knot carefully and draw up to collar.
|
The Four in Hand Knot makes for a
narrow, more discreet and slightly asymmetrical tie knot. It is best
suited for a standard button-down dress shirt and works best with wide
ties made from heavy fabrics.
While this tie knot can be worn by
anyone, it looks especially well on men with shorter necks as the knot's
rather narrow and elongated form stretches the perceived height of the
neck a tiny bit.
To tie the Four in Hand Knot, select a
tie of your choice and stand in front of a mirror. Then simply follow
the steps below:
|
1) The wide
end "W" should extend about 12 inches below narrow end
"N". Cross wide end "W" over narrow end
"N".
|
|
2) Turn wide
end "W" back underneath narrow end "W".
|
|
3) Continue by
bringing wide end "W" back over in front of narrow end
"N" again.
|
|
4) Pull wide
end "W" up and through the loop around your neck.
|
|
5) Hold the
front of the knot loosely with your index finger and bring wide
end "W" down through front loop.
|
 |
6) Remove
finger and tighten knot carefully to collar by holding narrow
end "N" and sliding the knot up.
|
The Pratt Knot - also known as the
Shelby Knot - is tidy and fairly wide, yet not as wide as the Windsor
Knot. It is well suited for any dress shirt and somewhat wider ties made
from light to medium fabrics.
To tie the Pratt Knot, select a tie of
your choice and stand in front of a mirror. Then simply follow the steps
below:
|
1) Start with
the tie inside out, The wide end "W" under the narrow
end "N".
|
|
2) Take wide
end "W" over and under narrow end "N".
|
|
3) Pull the
loop down and tighten.
|
|
4) Take wide
end "W" over to the left.
|
|
5) Pull wide
end "W" up, behind the loop.
|
 |
6) Bring wide
end "W" through the knot and gently tighten. The
widest part of the tie should be on the same height as the top
of your belt buckle.
|
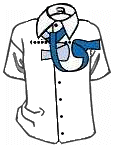
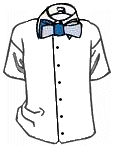
The Bow Tie Knot is used to tie a bow
tie and is worn to give you a formal and elegant appearance. A
"black tie occasion" such as a wedding is an event that you
would commonly wear a bow tie at, along with a tuxedo.
The proper size should never be broader
than the widest part of your neck and should never extend past the tips
of the shirt collar.
To tie the Bow Tie Knot, select a bow
tie of your choice and stand in front of a mirror. Then simply follow
the steps below:
|
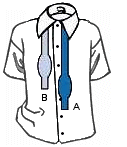
1) Place the
bow tie around your neck, situating it so that end "A"
is about two inches longer than end "B".
|
|
2) Cross end
"A" over end "B".
|
|
3) Bring end
"A" up and under the loop.
|
|
4) Now double
end "B" over itself to form the front base loop of the
bow tie.
|
|
5) Loop end
"A" over the center of the loop you just formed.
|
|
6) Holding
everything in place, double end "A" back on itself and
poke it through the loop behind the bow tie.
|
 |
7) Adjust the
bow tie by tugging at the ends of it and straightening the
center knot.
|
|